Recently, I worked to limit bandwidth to Per IP on MikroTik Router. Generally, I do not prefer to add any unwanted restriction on the network until its required for some administration reasons. Specifically, I am using MikroTik Per Connection Queuing (PCQ) feature to limit bandwidth to per IP on the network.
Limit Bandwidth to Per IP MikroTik
Meanwhile, I am using Winbox for this Article. However, you can use MikroTik CLI as well for this configure. Finally, Let’s start step by step procedure to limit bandwidth to per IP on MikroTik Router.
MikroTik Maximum Download Speed Queue
- Firstly, after Successful Login on MikroTik using Winbox, click on Queues in menu.
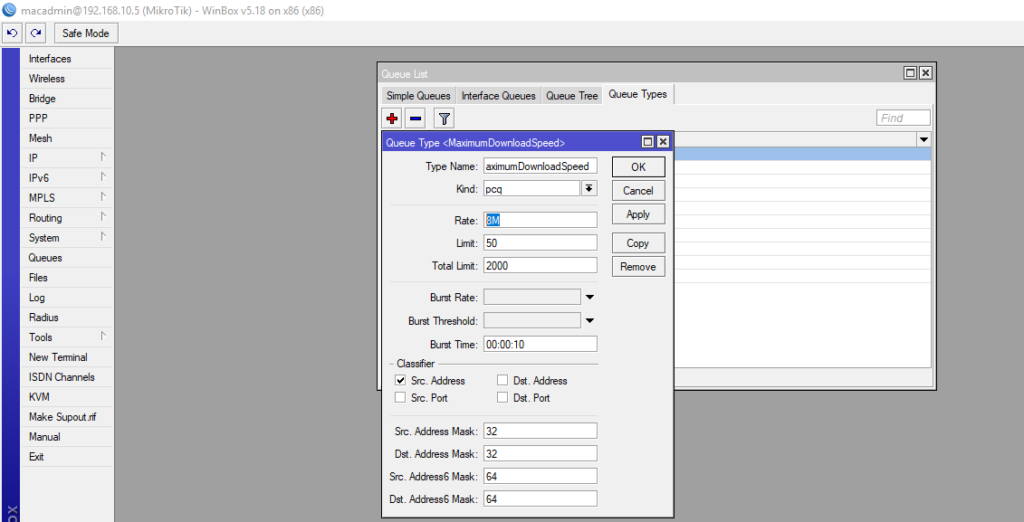
- Secondly, Navigate to Queue Types and Press Add + (Plus Sign) to add a new Queue Type.
- Then, in Type Name, Give a Friendly name.
- I used MaximumDownloadSpeed Type Name.
- Thirdly, In Kind field, select pcq, right after Type Name.
- Subsequently, in the Rate field, chose maximum limit for each IP Address.
- This will be the bandwidth limit, you want to set per IP.
- Then, Check Src. Address checkbox under Classifier section for MaximumDownloadSpeed Queue.
- Finally, Click Apply and Press OK.
MikroTik Maximum Upload Speed Queue
- Firstly, after Successful Login on MikroTik using Winbox, click on Queues in menu.
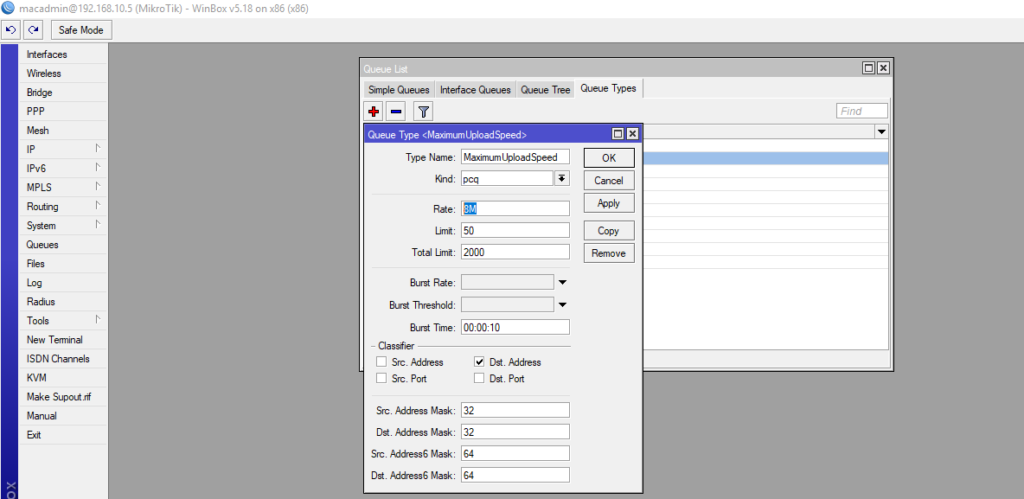
- Secondly, Navigate to Queue Types and Press Add + (Plus Sign) to add a new Queue Type.
- Then, in Type Name, Give a Friendly name.
- I used MaximumUploadSpeed Type Name.
- Thirdly, In Kind field, select pcq, right after Type Name.
- Subsequently, in the Rate field, chose maximum limit for each IP Address.
- This will be the bandwidth limit, you want to set per IP.
- Then, Check Dst. Address checkbox under Classifier section for MaximumUploadSpeed Queue.
- Finally, Click Apply and Press OK.
MikroTik Bandwidth Management Using Simple Queue
Meanwhile, MikroTik bandwidth management using simple queue is now easy while using previously created MikroTik Queue Types. Finally, it is time for MikroTik bandwidth management using simple queue, let’s start.
- Firstly, Navigate to Simple Queues and Press Add + (Plus Sign) to add a new Simple Queue.
- Then, in Type Name, Give a Friendly name.
- I used MaximumSpeedUser Type Name.
- Secondly, leave everything on default and click on Advanced tab.
- Now, under Target Upload, chose MaximumUploadSpeed in the QueueType Dropdown Menu.
- Leave everything else on default or match the boxes to image below.
- Further, under Target Upload, chose MaximumDownloadSpeed in the QueueType Dropdown Menu.
- Leave everything else on default or match the boxes to image below.
- Finally, Click Apply and Press OK.
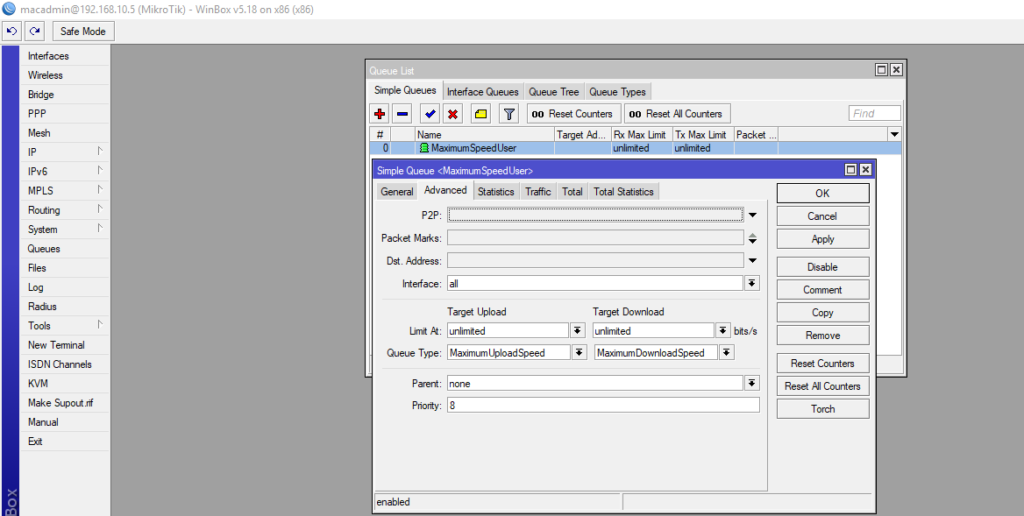
Of course, you need to make sure that you select the right option (in case different download / upload Type Name).